Alameda Sun, Thursday, April 9, 2020
by Birgitt Evans
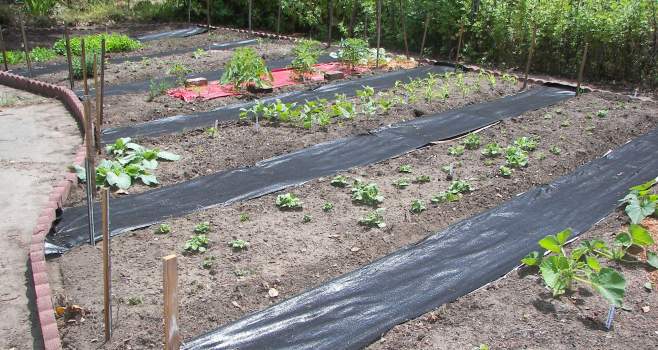
Newly planted vegetable gardens, like the one above, have sprouted up all over.
In March 2010, Alameda Backyard Growers (ABG) held its first meeting. Formed in response to the financial crisis in 2008, we created educational programming and set up Project Pick to help our community grow and donate food. Exactly 10 years later, we are pleased to be here to help our shell-shocked neighbors who are reassessing their lives and looking to food gardens as a way to weather this sudden storm.
The term “Victory Garden” was first coined during World War I, when the government sought to shift food production to home gardens, thereby freeing up food to feed the troops. The term was resurrected during World War II and again since then during times of crisis. To be most useful, a Victory Garden should focus on calories and nutrients and include foods that store well or can be canned such as potatoes, winter squash, pickling cucumber and tomatoes.
To start a food garden, begin by surveying the available land. Select a flat area with good drainage that gets as many hours of sun as possible. Although greens, peas and beans will make do with less, most vegetables require a minimum of six to eight hours of sunlight a day. Take both summer and winter sun into consideration. Areas to the north of a structure will get summer sun but will be shaded in the winter, and areas under a deciduous tree may be usable in the winter. This also holds true for container gardens.
Next look to the soil. Everything starts with soil. Success will be largely dependent upon the soil and how it is amended. Select an area that has been cultivated and amended recently. Resist the temptation to remove precious topsoil — it took 1,000 years to build an inch of topsoil and that topsoil contains the mineral nutrients and billions of microorganisms vegetables need to thrive.
Raised beds are expensive. Use them only if the best growing area is covered in cement or the soil is contaminated. Almost all soil, whether clay or sand, can be turned into an excellent growing medium with the removal of weeds and the addition of compost (hopefully homemade) to improve its tilth and make it loose, friable and able to hold the air, water and nutrients. For container gardens, use a soil mix designed for containers so they drain correctly.
Save money by making compost at home. Take a piece of shady land and make space for two three-foot-square compost piles. Layer equal amount of browns such as leaves or straw with greens such as green weeds or food scraps. The piles also need to be three feet tall to heat properly.
Add water so it is as moist as a wrung-out sponge and turn it every few days to the second spot to add the oxygen necessary for decomposition. Add a compost starter or a few shovels of a neighbor’s compost to add microorganisms and speed up decomposition. Work about four to six inches of organic matter into hard or sandy soils that have not been previously amended. Purchase compost if homemade is not available. Add an organic vegetable fertilizer as well.
Next, lay out dedicated garden beds that will not be walked on with 12- to 18-inch paths between them. Beds should be oriented from east to west so that all parts of the bed receive sunshine. Make beds two to four feet wide, so that the middle can be easily reached from both sides. Make them long enough to judiciously fill the space, but not so long that they are hard to walk around.
A 3×6-foot bed will hold six tomato plants or (with some planning) provide a year-round supply of salad greens or enough peppers or zucchini for a household all summer. Tall or vining plants like peas, pole beans, pumpkins or cucumbers can be grown vertically on trellises or tomato cages, saving room for other crops. Cover paths with a water permeable weed barrier.
In Alameda, most cool season crops can be planted starting around the beginning of February. Those include lettuces and greens, root crops, peas, broccoli, cauliflower, kale, onions and potatoes. Tomatoes, beans and zucchini can go in now and peppers, basil, corn and cucumbers in mid-April. Alameda doesn’t really have enough heat for eggplant or melons, although some yards may have a hot area that would work. Direct seed lettuce, root crops, beans, peas, squash, and corn, following seed packet directions on spacing and planting depth.
Transplant tomatoes, peppers, basil, broccoli, kale and onions. For transplants, consider the final size of the plant when planting and make sure to leave enough space for each one. Bury tomato plants deeply, because they will grow roots on their stems. Everything else should be planted at the same soil level it came at.
Always water after planting and monitor soil moisture levels carefully until the plants become established. Fewer, deeper waterings are better.
Once planted, monitor the garden for pests and make sure weeds are not competing with vegetables for sun, water and nutrients. In a couple of months, the harvests should begin to come in.
ABG is dedicated to teaching our neighbors how to grow food. During this difficult time, ABG’s education program has moved online. Join our mailing list at to receive timely gardening information.
ABG’s Project Pick is always looking for fruit trees to pick and volunteers to help pick them so we can deliver more fresh fruit to the Alameda Food Bank. To sign up, email info@alamedabackyardgrowers.org.
Birgitt Evans is an Alameda County Master Gardener and a member of ABG.