by Birgitt Evans
Master Gardener and ABG Board Member
When we first moved to Alameda, we rented a house with a huge garden and I began my lifelong experiment with growing as much of our food as I possibly could. In those days, I was wildly experimental, growing six colors of Hopi flour corn and dipper gourds up the back of the house. The latter was both unintentional and unsuccessful as the vines trailed higher and higher, but produced few fruit in the deep shade. I also grew crazy amounts of things and put up gallons and gallons of tomato sauce and the world’s most awful pickles and threw out a lot of food as it spoiled before we could use it.
Fast forward to today and I have worked out a) what I like to eat and how much our household will consume, b) what will actually grow well in my two garden spaces and c) how to plant in succession to get the most out of limited garden space and unlimited garden dreams. Come along with me as I plan my garden for 2023.
The first thing I consider is whether I have enough of my disposable supplies – potting soil, seedling mix, labels, seedling pots and trays, seed potatoes, seeds, fertilizers, dormant sprays for fruit trees, irrigation parts etc – to start the year. I take a rough inventory so I don’t wind up with six varieties of carrots and no parsnips and then I begin shopping or placing orders.
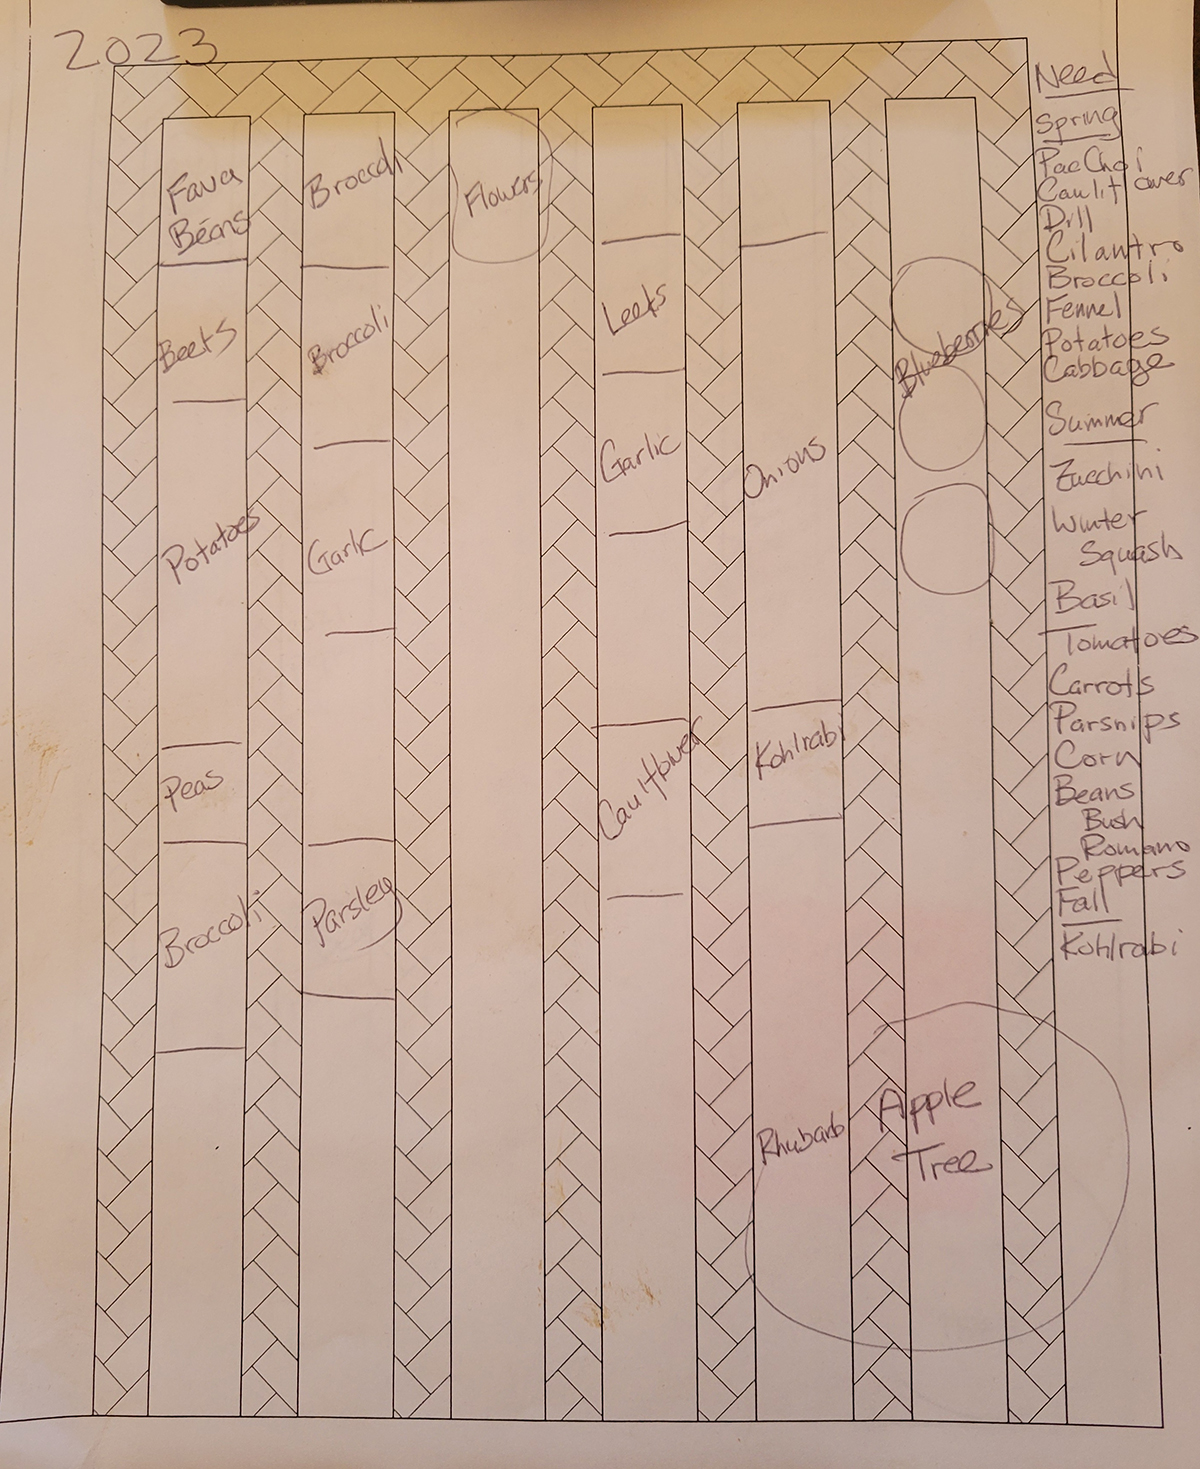
Click to enlarge.
In conjunction with this, I draw up my garden plan for the year. (See diagram.) In the plan, I fill in everything that is currently planted in the garden. And then in the right margin – referring to previous years – I fill in everything that I am going to want to plant in the garden in Spring (late-February/early-March) and Summer (late-April into July). Summer plantings include plants that replace winter and spring crops such as potatoes, onions, garlic, broccoli, peas etc in my succession.
Once I know what I will be planting and what I have, I can finalize my seed orders.
From last year’s seeds, I have already planted a couple of flats of cool season crops to go in as soon as they are ready. I place these flats on my very sunny southwest-facing front porch to grow. This way I do not have to set up lights or harden off crops that were already hardy enough to grow outdoors. (Note: I keep the flats indoors in my warm house for a few days after planting to speed germination and pop it outside when the first seedlings emerge.)
Around now, I begin washing used 6-packs in a 9 – 1 part water/bleach solution and cleaning my light table in the basement with a bleach solution and making sure that all the heat mats and lights are working correctly. When my seeds arrive, I will separate them by season and type. Most seeds will be started in flats to be transplanted later, ensuring success from tiny seeds. Large seeds and seeds of root crops such as carrots and parsnips – which do not transplant well – are set aside to go directly into prepared garden beds. Seeds that I will plant later – kohlrabi, rutabaga, leeks, onions and other fall crops – also get set aside.
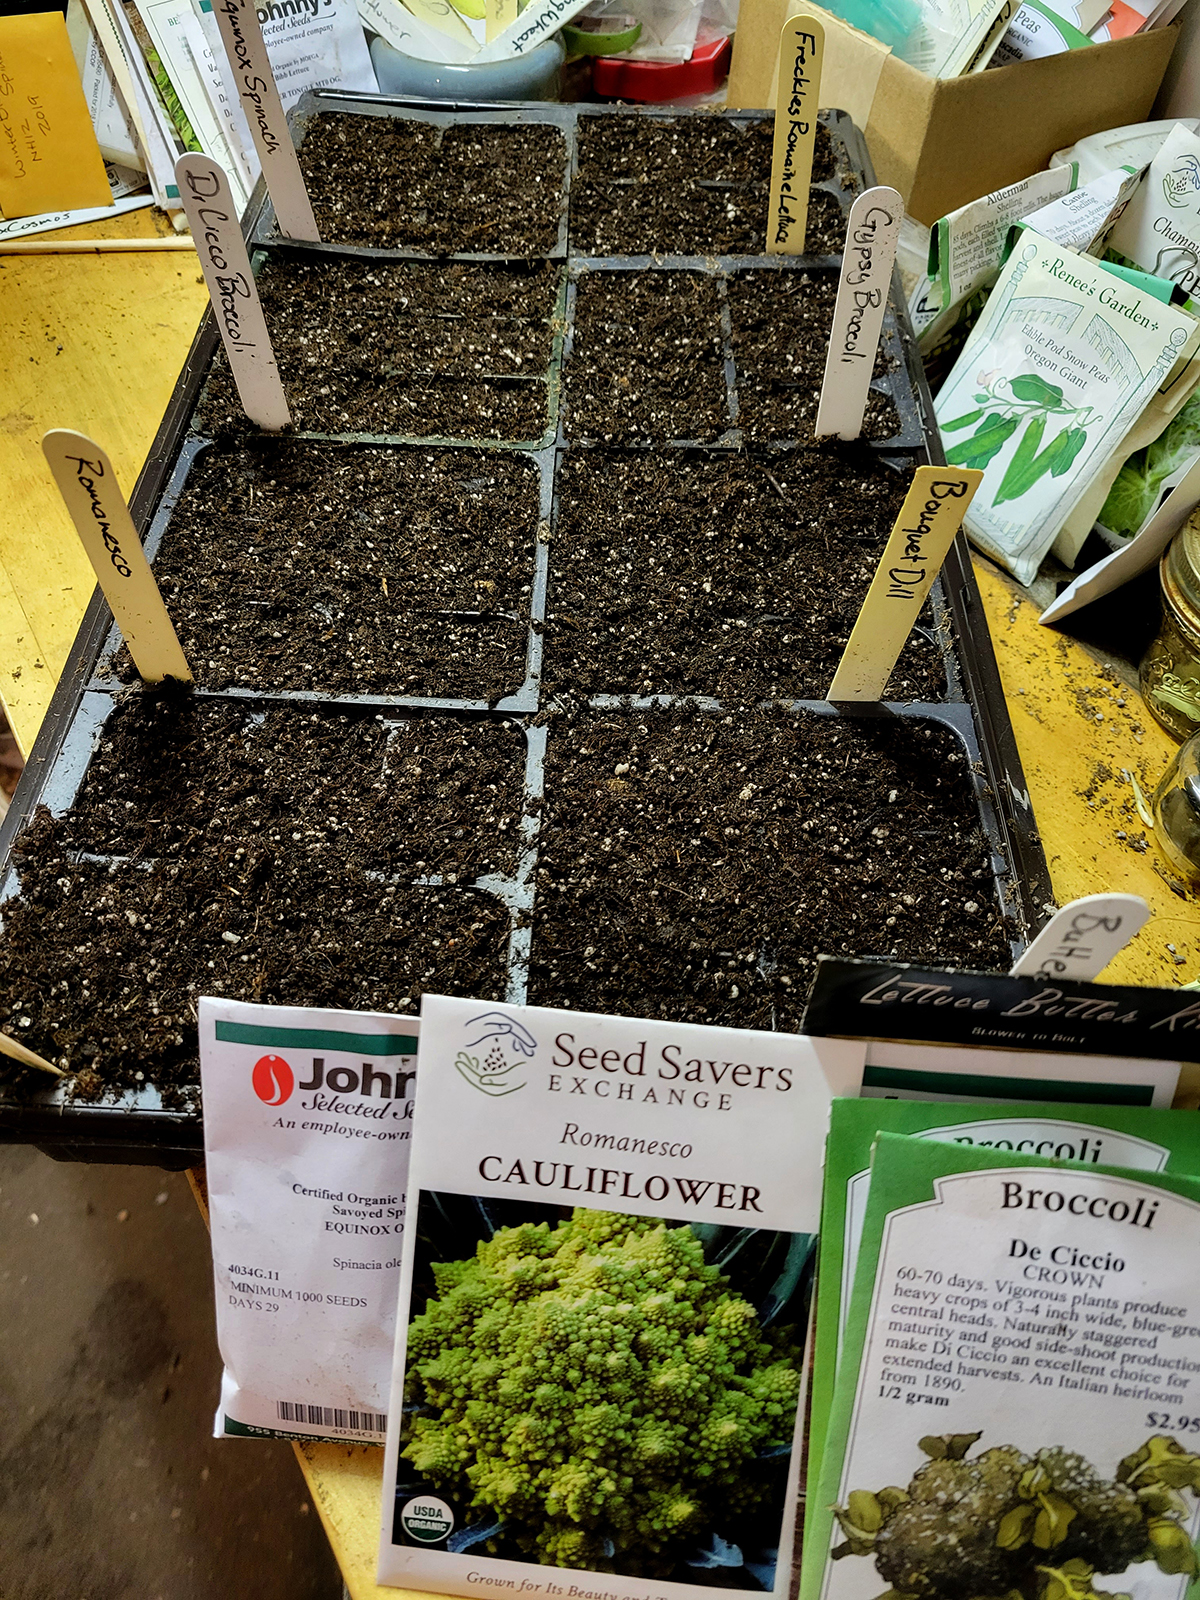
Click to enlarge. Planning Winter veggies.
Then I put together all the seeds that I will be planting under lights. Most of these are warm season crops that will be in the ground for the whole season and need a head start getting there such as tomatoes, peppers, basil, celery root and eggplants. I plant them using the techniques in this video (Seed Starting 101). I also reserve space for them in my garden plan.
Once planted, I set the flats on heat mats under lights. You can use grow lights or 4′ shop lights. Keep the lights 2″ above the seedlings as they grow. I use 10′ x 20″ (1020) seedling flats without drainage holes, so that I can water the flats without moving them. Check the flats daily as heat mats can dry out the light seedling mix pretty quickly and tender seedlings do not tolerate drying out.
As I am preparing for planting inside, so too I am preparing outside. The amount of compost I need for two gardens would be prohibitively expensive and so I make my own. Last fall I gathered leaves and I have added plant debris and green weeds through the fall and into winter. Now I start straining my compost piles and setting the finished compost out where the first plantings will be. As I strain more compost – adding winter weeds to it as I go – I will add piles of compost to areas where my March plantings of tomatoes and April plantings of peppers, basil, squash, cucumbers, beans etc will go. Spring is a busy time for the compost pile and it is nice to have some fall leaves available to add in with the green weeds, so plan ahead.
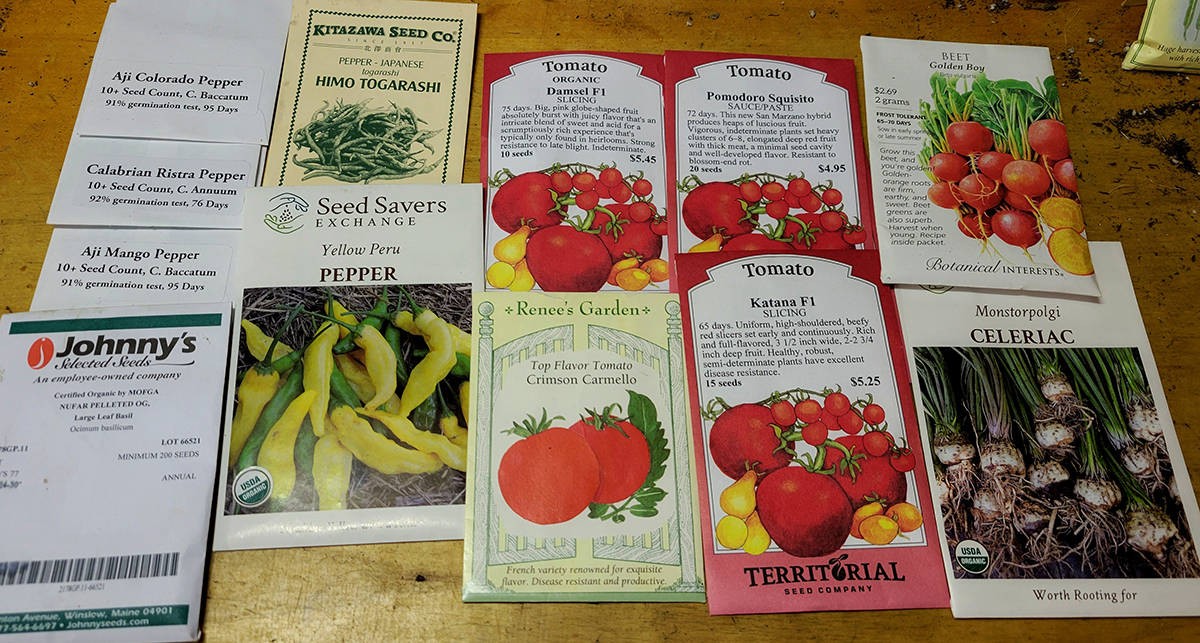
Garden Planning Summer Veggie Seeds
When my spring seedlings are ready to go into the ground, I rake out the compost, add a layer of powdered vegetable fertilizer and turn it all in, removing roots from the two large trees adjacent to my veggie garden. If you do not have issues with roots, you can add the fertilizer, top with compost and rake it into the top two inches of your beds. (But you will only know if you have root problems after you have turned your beds a few times.) Refer to seed packet instructions for spacing between plants and always water in your transplants.
Of the plants under lights, tomatoes will be ready to pot up to 3.5″ containers after 4 – 5 weeks. I then put them back under lights for two weeks before hardening off in mid-March. Everything else will be slower and you can leave peppers, eggplants, basil in 6-packs, transplanting so that there is one plant per cell and starting to harden off in early-April. To transplant into the ground, follow the same steps as above.
When I plant out my seedlings, I like to cover them with something to keep birds, rodents and cats from eating them or digging them up. There is nothing more frustrating than carefully growing seedlings only to see them dug out of the garden by some critter. You can make or purchase bed covers or use plastic containers with the tops and bottoms cut off. See the photo for some ideas.
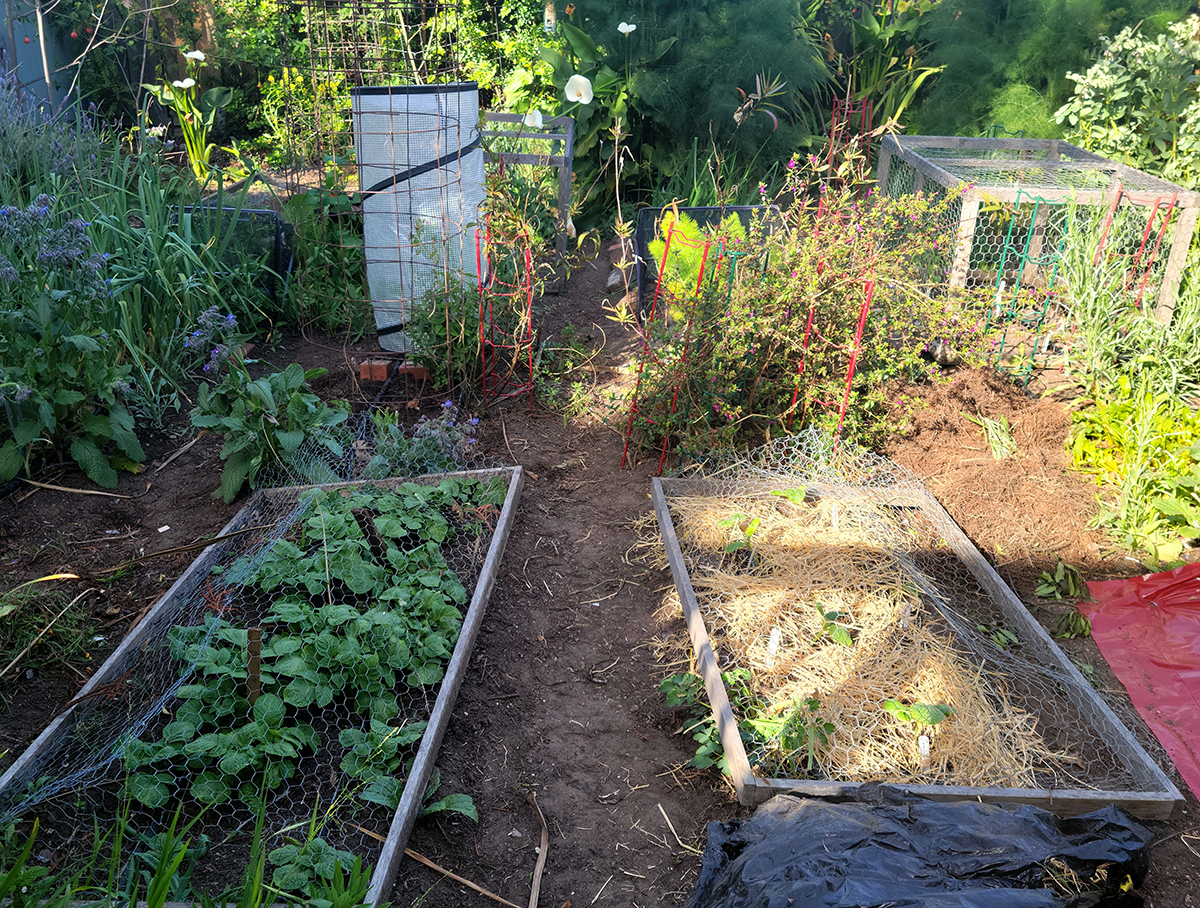
Garden Planning Bed Covers
Once you have your garden planted, it is a matter of watering and weeding and monitoring. Make notes on your calendar to remind you when to plant your replacement seeds. So if you are replacing potatoes with something, plant the seeds a few weeks before the potatoes are ready to harvest so your transplants will be ready to go. And strain some compost. Then it’s just a matter of harvesting and replanting the area as quickly as possible for maximum yields.
With a plan in place, good organization and all your supplies to hand, you too can make the most of your garden space and realize your garden dreams!