by Margie Siegal
One of the (few) positive side effects of the current pandemic is a renewed interest in self sufficiency. One way to become more self-sufficient is to learn to preserve food. By preserving, you take food that is easily available in large quantities for short periods (for example, the fruit from your backyard tree), and keep it not only edible, but tasty for long periods of time.
Preserving is a very ancient tradition. Preserving food in times of plenty against times of want was essential for survival up until quite recent times. Early methods of preservation included fermenting (pickles, wine, beer) and drying. Jams and jellies appeared when sugar became easily available. Canning became popular in the 1800’s. Finally, refrigerators and freezers became affordable by the average household in the 1930’s.
This article discusses the two food preservation methods I am familiar with: canning and drying. Long term freezing and fermentation are out of my knowledge base; hopefully someone else will write about them.
SAFETY NOTE: Improperly preserved food is not safe to eat. Some types of bacteria can even survive boiling temperatures if they are in a low-acid environment. Get a manual on food preservation, read it, follow the instructions, and do not take short cuts. I use PUTTING FOOD BY. (5th Edition, Plume Books, 2010) The BALL BLUE BOOK is another good one. An on-line resource is www.healthycanning.com. Do NOT rely on online blogs – I have seen some hair raisingly unsafe suggestions.
Drying
Most people are interested in drying fruit and tomatoes (which are botanically a fruit). There are several ways to do this. If you have a roasting hot backyard (rare in Alameda) you can sun dry. I have tried this, and it does not work in my micro-climate. You need three or four hot, fog-free days in a row in order to successfully sun dry. More successful alternatives for the San Francisco Bay shoreline are oven drying, drying in a homemade produce dryer or buying a commercial dryer.
Prepping the produce is the same for all types of drying methods. Clean carefully, check over for bad spots, and pit or cut up if you do not plan to dry your fruit whole. Smaller pieces will dry much faster than bigger pieces. Sprinkle the cut surfaces of fruit with Vitamin C solution, which will preserve color and stop oxidation. Check your preserving book for how to make up the solution. Crystalline Vitamin C can be bought online, or you can buy 1000 mg tablets and crush them as finely as possible. Some types of fruit need to be dipped briefly in boiling water to soften the skins.
Then either (a) truck your produce to your friend in Concord or Livermore and put it on trays in their backyard (a frame over the top draped with netting will keep the bugs out) OR (b) follow the directions for your purchased dryer OR (c) load up your home built dryer (PUTTING FOOD BY has instructions on building DYI food dryers) or (d) put your food on trays and put the trays in the oven, heated to 140 degrees. Dried fruit can be stored in glass storage containers in a cool, dark place, or it can be put in freezer bags and stored in the fridge. Refrigeration is best if you decide you want your dried fruit to be on the soft side.
Canning
I read a book in which the author recounted an episode where she and a friend got a truckload of fruit and worked overtime to use it all. “We did everything we could think of, except canning.” Canning that fruit would have been a lot less work than making jam, pies and muffins around the clock.
After you get your manual and read it carefully, go out and get equipment. Many items are probably already in your kitchen. If you look around, you can probably find a large pot that can be used as a boiling water bath for a few dollars. You will also need a jar lifter and a wide mouthed funnel.
Some basics:
Scrub your kitchen: You want to reduce the bacterial load as much as possible before you start to can.
Boiling water bath vs pressure canning:
As a rule of thumb, any kind of fruit, jelly, jam, and things with added acid, such as pickles, chutneys and salsas, are safe to can in a boiling water bath, while vegetables and meat are low acid and require a pressure canner (large bulky pressure cooker – your Instant Pot will NOT work). Tomatoes are a special case. They can be canned in a boiling water bath if you add lemon juice, as explained in your canning manual. Most experts suggest that new canners start with boiling water bath canning and then graduate to a pressure canner.
Canning jars:
Canning jars are specially made to stand up to heat and bouncing around in boiling water. They have two-part lids. Do not try to can in repurposed supermarket jars – broken glass is no fun. Jars can be washed and re-used indefinitely, as can the screw-on rings, but the central lid is one time only. Many larger supermarkets have canning jars. Target sometimes has jars, replacement lids and canning equipment. Pagano’s has jars, lids and equipment, and will get you a pressure canner if you decide you want to make that investment.
Outline of how it’s done:
Scrub canning jars and keep hot in boiling water. Scrub lids and rings Retrieve your produce, pick over, and scrub. Cut up your produce to the size you want. A Vitamin C solution will keep fruit from darkening. Heat the produce in liquid, or make your jam or jelly, fill your hot jars leaving a space at the top according to your manual, wipe the rims, screw down the lids, and heat your boiling water bath or pressure canner. When it is boiling, add your jars, bring back to a boil, and time according to your manual. Get the jars out of the canner, let cool, and check the lids to make sure you have a good tight vacuum seal.
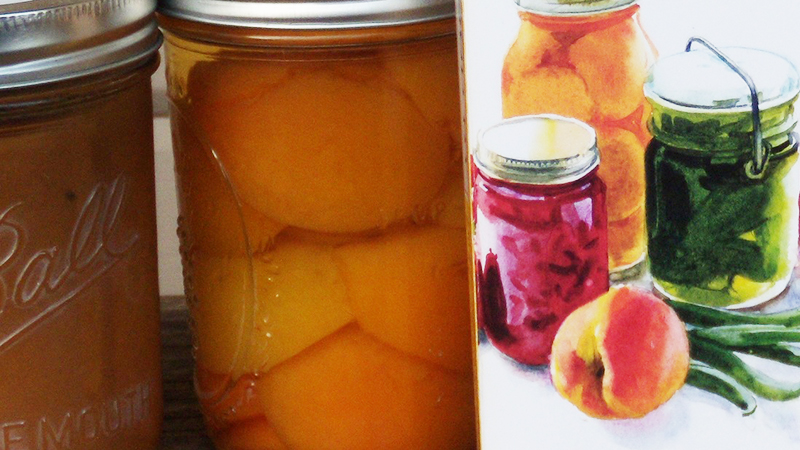
Aren’t the jars pretty? Don’t you have a sense of accomplishment? Enjoy a good gloat – you have earned it!