Alameda Sun, Thursday, June 11, 2020
by Birgitt Evans
 As if there isn’t enough to worry about in 2020, the Bay Area is in the grip of another drought year, having received only 40 percent of the average annual rainfall. Wait! Don’t run away. There is actually something gardeners can do about this problem: Build a simple drip-irrigation system.
Drip irrigation will deliver water where it is needed — to the roots of the plants — and save waste from overspray or runoff. With a little planning, a homeowner can install one in a weekend. A drip system consists of a series of parts put together a little like Legos.
The parts include a hose splitter, a filter to keep particles out of the dripline, a pressure regulator to keep the water from blowing everything apart, a female hose-end connector, a solid half-inch mainline to get the water from the hose bib to the garden, various tees and elbows to get the mainline where it is needed, the 1/4-inch dripline itself, connectors to get the water into the dripline, and end plugs — mainline and dripline — to close up the end of the lines. You can also use soaker hoses or drip tape — just substitute them and their fittings for the 1/4-inch dripline covered here.
Start by making a measured drawing, including the hose bib and garden beds. A drawing will help in counting the number of elbows, tees, feet of mainline, feet of dripline, connectors, and end plugs needed for the garden. For raised beds, factor in the footage of mainline and elbows needed to get up into each bed. In Alameda’s sandy soils, water does not spread out like it would in clay soils and goes straight down. For vegetable beds use 1/4-inch dripline with holes placed every 6 inches and plan on one line every foot or so. So, if the bed is three feet wide, use three evenly spaced driplines. For trees and large shrubs, use half-inch drip tubing placed out at the drip line of the tree or shrub where the feeder roots are, not right next to the trunk.
Starting at the hose bib, using a brass two- or four-way splitter will allow for various watering zones and for a hose for miscellaneous garden watering. Trees and vegetable beds are usually best on separate systems and drought-tolerant natives will need a lot less water. The correct order of the parts coming off the hose bib is: pressure regulator, filter, timer (if desired), and a female hose-end connector into the mainline.
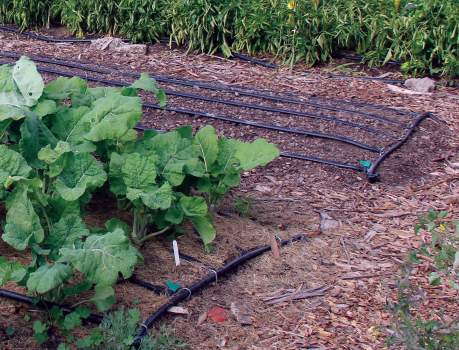
It is critically important to run the mainline to a point in the middle of the area to be irrigated and not to one end. Then connect a tee to it and run mainlines right and left to the ends of the irrigated area. The dripline will then come directly off of those branches. For example, if there are five parallel beds each two feet wide, run the mainline to the center of the middle bed and connect the tee. The five lengths of dripline will be to the left of the tee and five to the right. If you start at one end, the first bed will be soaked and the last bed will be bone dry.
It sounds complicated and there will probably be a trip or two back to the irrigation store for more parts, but a basic drip system is not beyond the ability of most homeowners. The Alameda Backyard Growers is considering hosting a hands-on education program on installing irrigation systems once it is safe to do so. In the meantime, if you need help visualizing how all of this will come together, search on YouTube for “how to build a drip irrigation system for a garden” and you will find several helpful videos.
With a little patience and trial and error, homeowners can go a long way to reducing water use in this drought and have healthier, more productive gardens.
Birgitt Evans is an Alameda County Master Gardener and a member of ABG.