by Birgitt Evans
By now you have heard about our Free Seed Library and possibly availed yourself of some of the more than 1,100 packets of seeds that we have distributed. Now that you have seeds though, what do you do with them?
You have two choices. You can plant them outside, directly in the ground or you can start them in containers for transplant. Linda Carloni has covered direct seed sowing in her article here. I will cover the two variations of sowing seeds in containers. For most of the year in Alameda, you can place your containers outside on a sunny porch or deck and grow the plants to the desired size and then transplant them. In the winter, however, tender summer crops need to be started indoors under lights which requires extra attention to cleanliness.
Starting Seeds Indoors Under Lights
Tomatoes, peppers, eggplants and basil are tender annuals that take a long time to grow from seed. They are, therefore, most often started indoors under lights to extend their growing season. Squashes, cucumbers and melons don’t take as long, but are often started under lights to produce an early crop. While you can use a sunny window, for best results and to avoid “leggy” seedlings, you will need the following supplies and equipment:
❀ Pots – There is a wide variety of choices. You can reuse plastic 6- packs, egg cartons or yoghurt cups or use a soil blocker. Make sure your containers have holes for drainage.
❀ Labels – Labels will help you remember what you planted. Use plastic labels or popsicle sticks.
❀ Growing Medium – You need a sterile mixture that is both light and airy and holds water. You can buy premixed seed starting mixes from most seed catalogs and nurseries or blend your own using 2/3 peat moss or coco peat (for moisture) and 1/3 vermiculite or perlite (for aeration).
❀ Trays – Select a tray without holes to contain your pots or soil blocks since you will be watering from the bottom to minimize damping off and other fungal diseases.
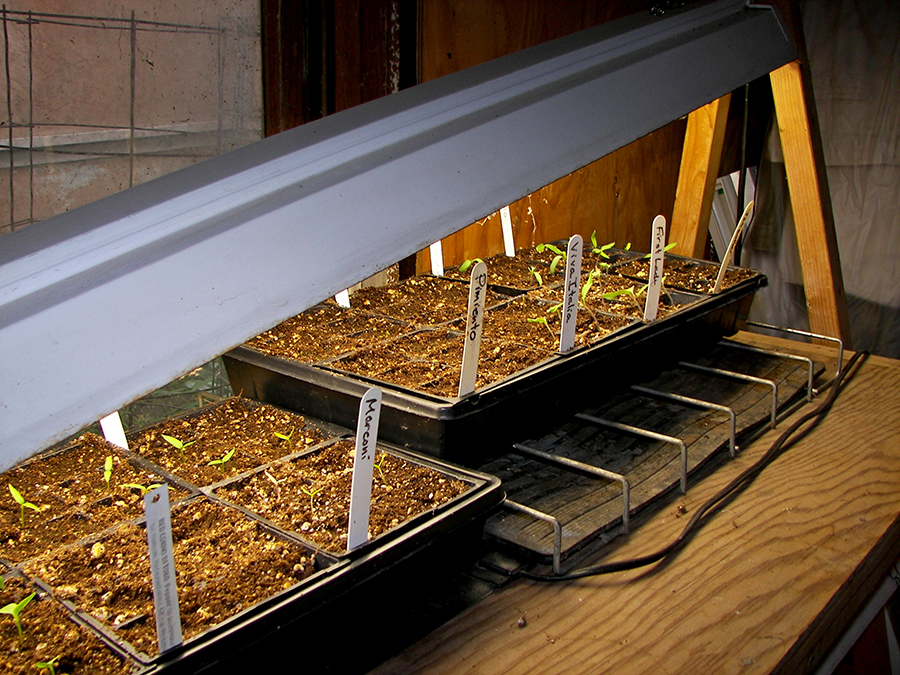
❀ Light Source – Your seedlings need 14 – 16 hours of light a day. Two or four foot shop lights with regular florescent bulbs are inexpensive and work well. (You can also buy special grow lights.) You will need to raise and lower your lights so that they remain a constant 1 – 2″ above your seedlings as they grow so suspend them on chains from above.
❀ Heat – You can buy a variety of heat mats specially designed for seed starting or set your flat on the refrigerator until the seeds germinate and then immediately move the flat under the lights.
❀ Fertilizer – Seeds contain the energy to germinate and produce two leaves; after that you need to fertilize them. Add a mild (3-3-3), water soluble fertilizer to the water once your seedlings have emerged. Or mix a powdered fertilizer into your seedling mix at a rate of 1 cup per cubic foot of seedling mix.
❀ Seeds – There are dozens of catalogs offering everything from the latest hybrids to heirlooms and Native American crops. The choice of varieties is, in fact, one of the primary reasons for starting your own seeds. Or visit the Free Seed Library.
Basic Considerations
Cleanliness Counts
Germinating seeds and young seedlings are very vulnerable to fungal diseases such as damping off. It is critically important that you clean everything that will come in contact with your seedlings. If you reuse pots and trays, always make sure to wash them well. A solution of 1 cup of bleach per utility sink of water works well. In addition, wipe down my your starting table all the surfaces that will be around your seedlings. Finally, watering your seedlings from below by pouring the water directly into the tray and letting it seep up into the pots also helps to prevent fungal diseases.
How Deep to Plant and Other Considerations
Your seed packet will tell you the recommended planting depth for your seeds. A good rule of thumb is to plant the seed 2 – 4 times as deep as it is in diameter. That is, if a seed is 1/8th of an inch in diameter, put 1/4 -1/2 inch of soil over it. Some seeds have special requirements for germination, requiring light to germinate. Or they need cold or heat stratification; that is, they require periods of cold or heat, mimicking their natural environment, in order to germinate. Others have hard seed coatings which must be nicked or soaked in order to release the plant inside. So you may need to refrigerate or soak your seeds in water before planting. For example, New Zealand Spinach will have much better germination if soaked before planting. Most common vegetable seeds don’t have special requirements, but check your seed packet for special instructions.
Hardening Off
You will be growing your seedlings in a warm place under lights with only a fraction of the sun’s intensity. If you take them out of this protected environment and put them straight into the garden, they will burn and possibly die. It is very important to harden off your seedlings by putting them outside in the sun for a couple of hours the first day. You can then, gradually begin extending the time they spend in the sun and eventually leave them out overnight. After seven to ten days, they will be ready to go in the ground.
Step by Step Seed Starting Review
1) Assemble all of your equipment.
2) Wash all of your pots & trays.
3) Mix the growing medium, if you are making your own. To the peat moss, add 1⁄2 as much vermiculite or perlite. Mix thoroughly and break up any clumps with your hands. Add water. You want the mixture to be moist so that it will wick up the water you put in your trays, but not soggy or it will be difficult to work with.
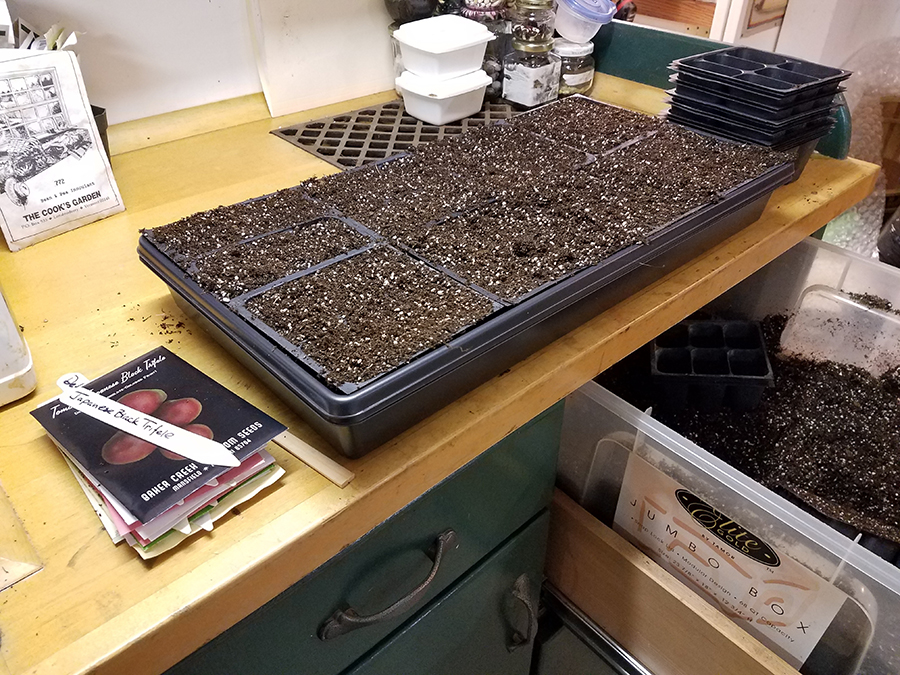
4) Fill your containers with the growing medium, making sure that the medium is packed in firmly, but not compressed.
5) Choose your seeds. For very small seeds, brush back the top layer of soil, sprinkle a few seeds in each cell and then cover them lightly with the reserved soil. For medium sized seeds, use a wooden chopstick to create a hole or depression and then place a seed in it. A good rule of thumb is to plant one or two seeds per 6-pak cell and then transplant them up into 3 1⁄2 inch pots when they are about 5 weeks old. For large seeds like beans or squash, use larger containers and just push one seed into the growing medium in each cell. These plants will grow rapidly and will not tolerate long periods in small pots, so plant them two to three weeks before transplant time.
6) Label each container. Include information you may need later on the label.
7) Place the containers in your trays and add water directly to the tray. Pour off excess water.
8) Place the tray on your heat mat, lower the lights to about an inch above the containers and turn on both lights and heat sources. Putting the lights on a timer for 14 hours a day saves the trouble of remembering to turn them on and off.
9) Eagerly examine the tray each day for signs of life. Once your seedlings emerge, you can begin adding fertilizer to the water. And after a few weeks they will be ready either to transplant into larger pots or to harden off and send on their way in your yard.
Starting Seeds Outside in Containers
Root crops and larger seeds are best planted directly in the ground, but smaller seeds such as those of broccoli, cauliflower, kale, cabbage, lettuce, parsley and onions are best started in containers and transplanted. They are, however, not cold sensitive and will germinate and grow on a sunny-but-not-too-hot deck or porch from March through early November in our climate. From May through August, you can do the same thing with basil, cucumbers and other summer crops.
To do this, you will need all of the materials except for the heat mat and light set up. You don’t need to maintain quite as sterile an environment, but it is always a good idea to use clean pots and trays and keep your seedling mix in a dry, clean location. Follow instructions 1 – 7 above. Once you have planted your containers, water and place them outdoors in a sunny spot where you will see them often. Most of these plants can take a good deal of sun with the caveat that they have to be kept moist. Be sure to let them dry out a little between watering though or they will rot. Once the plants are 2 – 3 inches tall (or the onions are 1/8th of an inch in diameter), transplant them into a bed amended with compost and fertilizer.
While the lists of equipment and steps may initially look long, once you have the necessary supplies, growing vegetables from seeds is an easy and inexpensive alternative to buying nursery starts. One that gives you enormous flexibility in both varieties and timing and ensures that you have the plants you need available to transplant into your burgeoning vegetable garden.