by Sarah Miller, Master Gardener
 The process of worm composting (or vermiculture) can be a mutually beneficial undertaking. Your child learns about worm biology, decomposition and waste reduction, and the worms create black gold for your garden, also known as worm castings or worm poop. To get started you’ll need a few things, many of which you might already have around your home: a bin, bedding materials, worms, and food waste from your kitchen or garden. Let’s go through each step.
Bin
For this step, the options are only limited by your imagination. A worm bin can be something as simple as a storage bin from the hardware store, perhaps a repurposed shipping crate, or even a fancy specially made bin that is specifically designed for worm propagation. The container should be 10″-16″ deep, have holes in the bottom or sides for ventilation, and it should have a lid that fits snugly to keep out any unwanted guests. My family chooses to keep our bin outside, under our deck, which keeps a moderate temperature, ideally between 55 and 78 degrees. Kitchens, garages, laundry rooms can also be a convenient location to keep your bin, just be sure it is out of direct sunlight.
Bedding
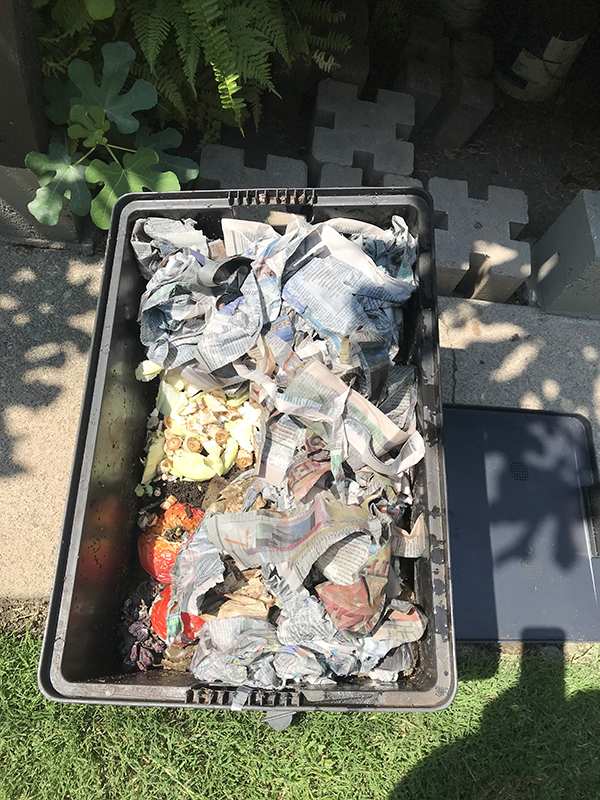
Worm bodies consist of 75-90% water and need a moist environment to thrive in. Their bedding should have the ability to absorb water to keep them comfortable. We utilize our black and white Sunday newspaper (not the glossy paper) by tearing 1″ strips and soaking them in water, squeezing them out so that they are not dripping, fluffing them a bit and layering them over cardboard, leaves, compost, sawdust and even straw. When choosing materials, consider introducing or expanding on the ideas and principles of reuse. The bedding medium you choose is also where you will bury the food waste, which aids in the prevention of any odors later on.
Worms
Eisenia fetida is the scientific name for compost worms, and are more commonly called “red wigglers” or “red worms”. These are a different species from earthworms or nightcrawlers, who do very different things to their environment. The life’s goal of red wigglers is to eat decomposing organic matter; they can in fact eat their own weight each day. Our family began our bin with one pound (approximately 1,000 worms) of red wigglers from Delta Worms, but there are multiple compost worm sources in or near the Bay Area to choose from, or you could also get red worms from a friend who has a worm bin with worms to share.
Feeding
When starting your worm bin, give your worms approximately a pound of fruit and vegetable trimmings, then leave them alone for 10-14 days. This will allow them to acclimate to their new home, and provide them a source of energy to work with. After 14 days feed your bin with about a quart of fruit and vegetable trimmings weekly. Although worms are not picky eaters, there are some limits when it comes to food: no meat, dairy, whole eggs (egg shells are ok), grains, citrus, nuts or pits, oil, onions, garlic or prepared foods. Although worms CAN eat many of these things, they are also attractive to animals many of us consider pests like mice.
Some surprising things that worms enjoy are coffee grounds even with paper filters, tea bags, lawn clippings, and weeds. Because worms are without teeth, and have gizzards (similar to birds), it’s recommended that periodically you add ground up eggshells, oyster shell “flour” or a handful of gritty soil to the bin to help worms grind the bits of food they ingest.
I hope this article has given you the confidence and knowledge to begin your own worm bin with your kids. If you are looking for a deeper dive into vermiculture, consider reading Worms Ate My Garbage by Mary Appelhof and Joanne Olszewski. It is a fun and fast read with your kids and can answer any lingering questions you may have and give you more talking points to discuss with your family.
Get out there and get composting!