

Wreath Making Workshop
Saturday, December 5, 1 to 3 pm
Join us to create a beautiful, decorative Holiday Wreath!
When it comes to wreaths, do you prefer homemade to store-bought? Do you like to add your own touch and flare? If you like the DIY method, then please join us to create a beautiful, decorative Holiday Wreath — for your home or for a gift.
ABG’s Annual, FUN, outdoor, in-Alameda Wreath-Making workshop will be held Saturday, December 5, 1 to 3 pm, rain or shine! We will use gathered and purchased items to craft unique wreaths for the table, wall or door.
ABG will provide: instruction, wreath forms, floral wire, glue, boughs, some natural gatherings, trimmings and light refreshments.
We ask attendees to bring some supplies of your choice like: boughs, pine cones, grape or other vines, Eucalyptus branches, olive branches, magnolia leaves, ginkgo leaves, seed pods, shells, feathers, grasses, fresh herbs, dried fruit, ribbons, bows, and trinkets. Feel free to bring your own clippers as well.
Fee: The workshop fee is $35.
Registration on EventBrite is required and we can only accommodate 25 adults. Children 10 years old and up may attend with an adult for an additional fee of $10 to be collected at the event.
Please let us know at least 2 days in advance if you need to cancel, so we can let someone else take your place.
The workshop’s location will be revealed after you have registered.
NOTE: There is a restroom and ample parking.
It may be chilly so please wear layers.

Composting with Worms Workshop
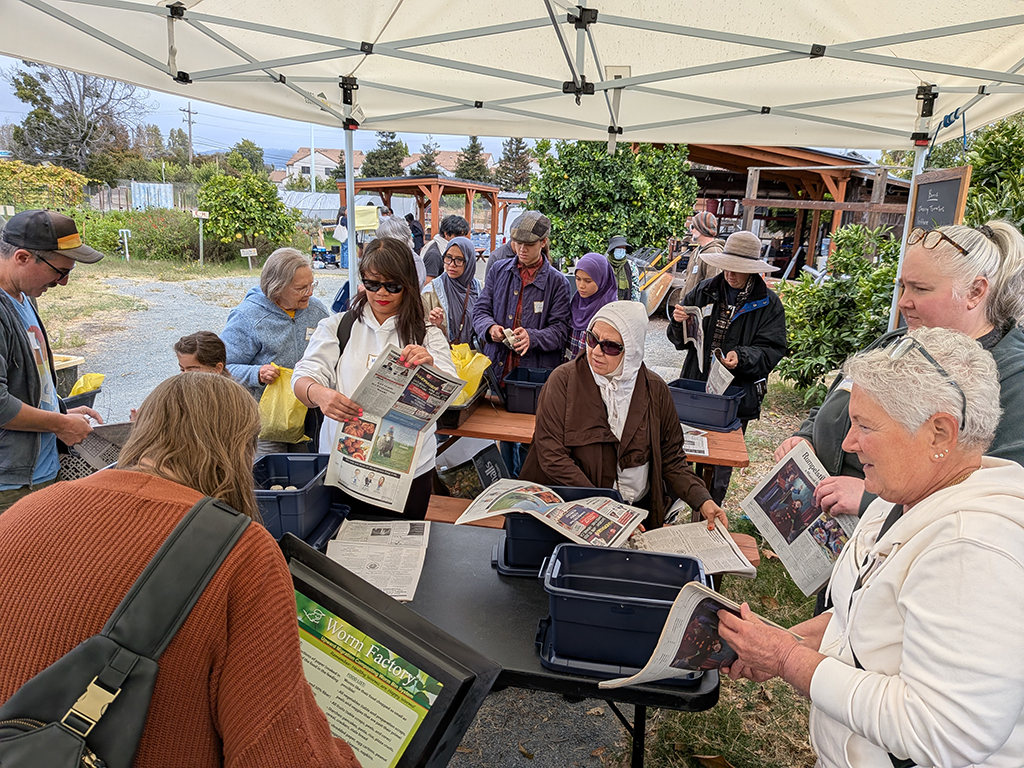
This workshop was held on Sunday, September 20, 2026 at Farm2Market at the Alameda Point.
Here are some notes from this workshop:
You can also watch Lori’s Worm Composting YouTube video: How To Worm Compost at Home!
Benefits
- Tending a worm bin is a handy way to recycle wastes (especially food scraps). Its small size makes it perfect for those who have vegetable and fruit waste but no back yard space for a regular compost bin.
- Worm castings are a nitrogen-rich fertilizer for all kinds of plants.
- Worm castings help to build a healthy soil; they can lighten clay soil and make an aggregate out of sand and silt, because red wigglers produce gummy substances during digestion that help soil particles clump together.
The Humble Worm
- Red wiggler worms can process from 20 to over 200 tons of soil per acre.
- This worm species matures at 10 weeks of age (the non-segmented band near the top third of the worm will change color). Being hermaphroditic, red wigglers can proliferate at astounding rates, producing 2 to 3 eggs per week for 6 months to a year. The eggs develop in 3 weeks and one egg can contain many worms.
- A red wiggler has 5 hearts. And instead of teeth, they have a crop and a gizzard like birds have, in order to digest their food.
The Worm Bin
One - Get a bin. Either
- DIY (tote, dark color, should have a lid; drill air holes along top edge
- Or Purchased (stackable; made for ease of harvesting)
Two - Get Red wiggler worms (one pound to start)
Three - Get some bedding (controls moisture, insulates bin: newspaper, cardboard egg cartons, coconut coir
Four - Make sure you have some worm food
- Feed them and let them settle for a week.
- Feed often; they can eat their body weight in food daily. Add more food scraps every 2 to 3 weeks.
Food
- What goes in: fruit and veggie scraps; egg shells; used coffee grounds (with filters); tea bags.
- What stays out: bones; meats; fats; dairy; citrus; spicy foods; beans; chiles; all members of the allium family (garlic, onions, shallots, etc); aromatic herbs (example: rosemary). No corn cobs or avocados (they don’t break down). Also, no cooked food or yard waste.
- If you feed the worms something they don’t like, take it out and let the remaining debris get eaten by bacteria/fungi until it crumbles and falls below.
Tips
- Optimal bin temperatures are 59 to 77 ℉.
- Be sure to bury the food under the bedding.
To set up the bin
- Line the bottom with cardboard or open egg carton(s).
- Second, lay down shredded wet paper (newspaper, etc.).
- Third, place worms and food on the wet paper.
- On top of worms, place more shredded wet paper.
- Finish with a topping of shredded dry paper (pile it up loosely; the less empty air space, the more it discourages fruit flies). Dry shredded paper also helps absorb excess moisture.
Harvesting the worm castings
When is it ready?
Methods of harvest
The migration method: Make a trench by pushing compost to one side. Fill the other side with fresh bedding and food, and wait for the worms to migrate over. For layered bins, put a new tray over an old tray, and the worms will migrate up into the new tray. Use wet, shredded paper for the worms to crawl up into.
The Pile method: This is where you use light to convince the worms to migrate away from the castings you want to harvest. Pile the compost into a mountain shape on a clean tray, plastic sheet or tarp and expose it to strong light (sunlight or strong lamp). The worms will begin to move down to the base of the pile where it’s darkest. Harvest off the top of the pile and put the rest back in the bin when you’ve taken the amount you want.
The colander method: After letting the compost dry out a bit (usually within a day), take a scoop of the compost and gently sift using a kitchen colander placed over a large bowl, putting back the worms and adding more compost as needed.
Tips:
- Harvest the full amount of worm castings at least once a year.
- Store castings so they don’t get either too dried out or too moist; dried-out castings have the hardness of lava!
How to Use
- Note: Castings are nitrogen-dominant, so add some phosphorus to the mix when you feed.
- Mix solid compost 20% with potting soil
- Make a compost tea with water and castings, diluting it to the color of weak tea. Pour on plants.
Troubleshooting
- Worm run: When the bin’s environment goes off-kilter (it’s too wet, there’s poor airflow due to rotting food, or the bin gets too hot or cold), the worms will try to make a break for it, collecting around on the sides or top of the bin.
- Fruit flies: Bury food under bedding; too much food or too much moisture can bring flies.
- Red mites: These may show up when the compost gets too wet and/or acidic (too many fruit scraps?). Use bread slices as traps. Once the mites gather on it, remove it.
- Ants: Use petroleum jelly barrier on the bin or put the bin’s legs in water barriers (cat food cans are great for this).
For questions, please contact Lori Caldwell (lcaldwell@stopwaste.org) or Jeannie Pham (jpham@stopwaste.org). Lori has lots of youtube videos online.

Tomato Care Workshop
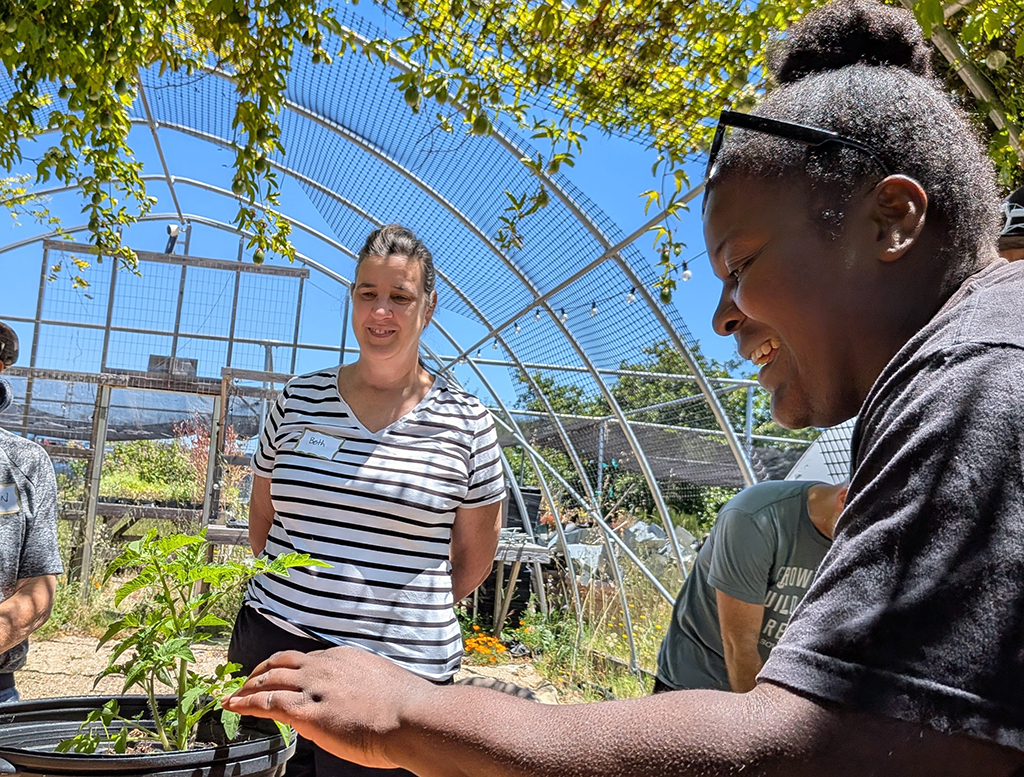
On Saturday, June 13, 2026, Ploughshares Nursery General Manager Jordan Taylor gave a comprehensive talk on the ins and outs of caring for our backyard tomatoes throughout the season. Though most everybody has some experience growing tomatoes, access to a nursery professional like Jordan helps fill in the various knowledge gaps we all have (plus, Jordan picked up her tomato smarts in New Jersey, where tomatoes don’t get any juicier and more delicious in mid-summer).
Some wisdom from Jordan:
It’s well-known that tomato plants – and other plants of the nightshade family (tomatoes, eggplant, peppers and potatoes) – can take advantage of deep planting to form new roots. It’s actually the numerous tiny hairs all up and down the main stem of the plant that enable that new root production, if the plant’s stem is buried either vertically or horizontally in a trench method.
Feeding a tomato plant should be done throughout the growing/fruiting season. Begin with a tomato & vegetable fertilizer with a balanced NPK (Nitrogen/Phosphorus/Potassium) ratio. Mix the proper amount (according to package directions) in with the dirt in the planting hole. Feed the plant weekly with this formula until blossoms appear. At this point switch to a lower-nitrogen/higher-phosphorus & potassium formula to support better blossoming and fruit production. Use granular fertilizer for plants in the ground, liquid fertilizer for those in containers.
For bushy (determinate) tomato varieties, pinch out some of the suckers that form at the junction between two branches. This allows free movement of air through the plant and sunlight reaching into the plant’s middle. Pinched-off suckers can be sprouted into new plants when dipped in Rootone and planted directly in soil.
For vining (indeterminate) tomato varieties – which tend to sprawl or wander through the rest of the garden if left to themselves – decide after planting how many vines you want to keep: one vine for vertical cordoning of the plant on a trellis; three if the plant will be caged or staked. Narrowing the number of vines forces the plant’s energy into each vine for better fruiting. This is especially true for cherry tomatoes.
To keep pests and diseases at bay:
- Keep tomato plant leaves from touching the ground, to avoid contamination from soil-borne diseases (blights, wilts, etc.).
- Plant basil and marigolds to ward off hornworms.
- Attract beneficial insects by including borage, parsley and/or dill.
Be careful with your watering:
- Inconsistent watering can cause Blossom End Rot (BER) – especially on paste-type tomatoes. Some tomatoes split when the outside skin is done growing, but too much water causes the inside to keep expanding.
- If tomato plants wilt a bit during the day, they don’t necessarily need more water. The real indication of insufficient watering is, if the plants are still wilted the next morning.